onePOS supports integration with Hot Schedules. To begin setup, retrieve the following credentials from your Hot Schedules account.
Hot Schedules Client ID
Hot Schedules Concept
Hot Schedules Password
Hot Schedules StoreNum
Hot Schedules Username
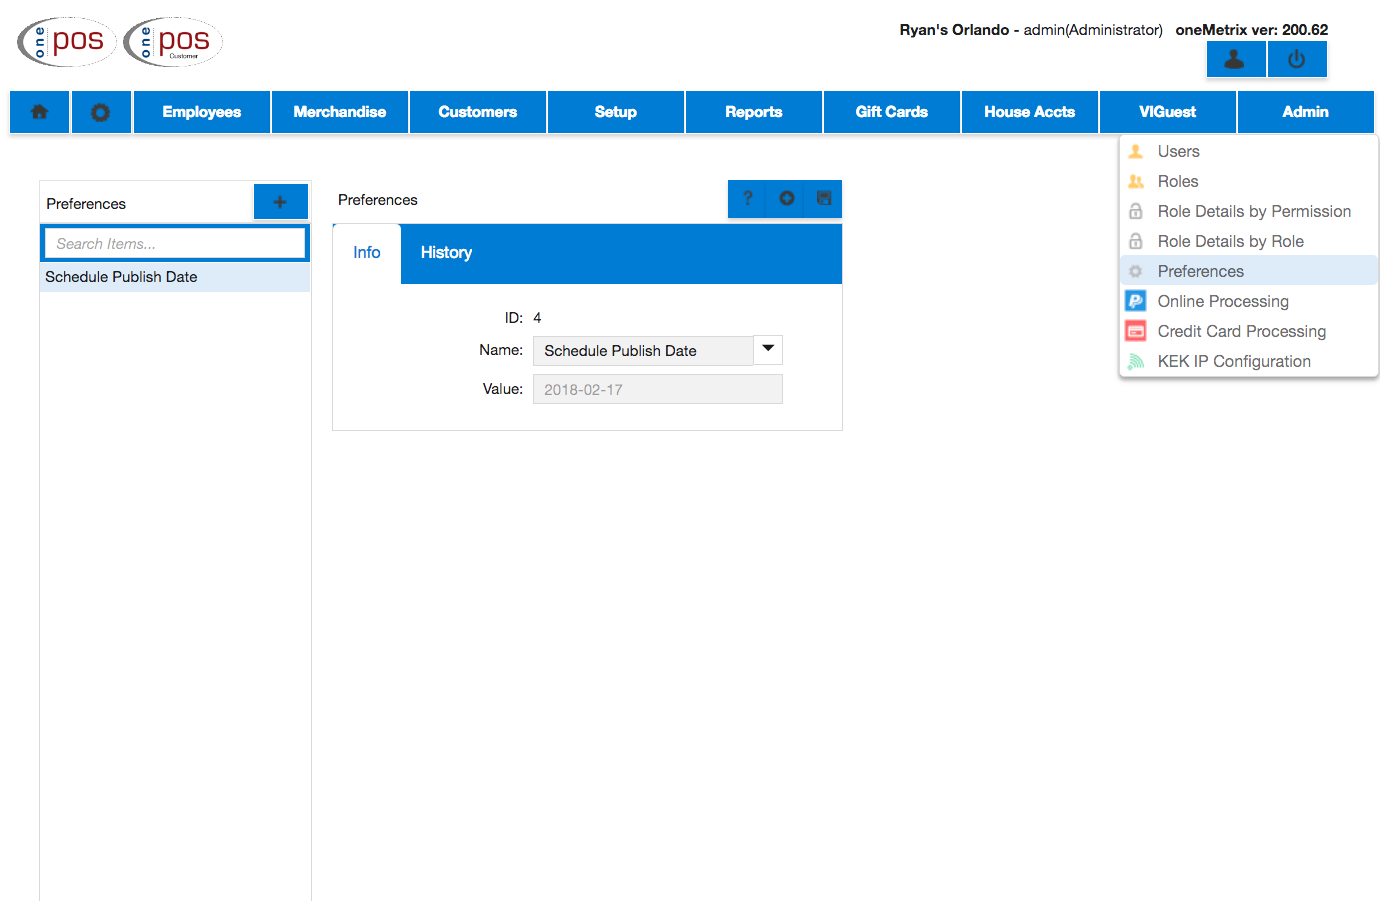
Set these in Preferences in oneMetrix by logging in and navigating to Admin->Preferences. Press the “+” button and select each of the values stated above, and set them to their proper values. Also, make sure that the preference for Schedule Source is set to Hot Schedule. Save your updates, and make sure that the Preferences have been created.
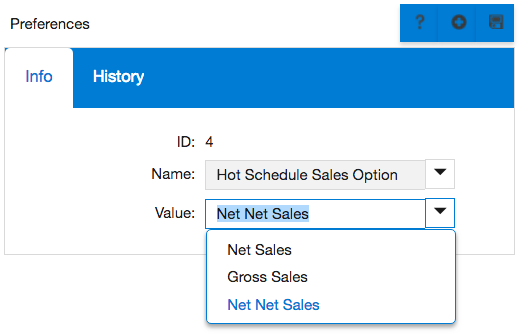
For Advanced HotSchedule sites, there is an option in oneMetrix to indicate what type of sales to send from oneMetrix to HotSchedule. These include the following: Net Sales, Gross Sales, and Net Net Sales. Go to Admin -> Preferences, and select the Hot Schedule Sales option. Select the applicable value from the drop down to send the type of sales to HotSchedule. The next time HotSchedule sales are synced, the software will use the selected option. If none is selected, the Net Sales are sent by default.
Setting Up Employees and Pay Categories to Sync
To sync data from oneMetrix to HotSchedule, please ensure that you have all applicable employee permissions setup correctly. These include employees and pay categories.
- Enter the ExtIDs for your Employees and Pay Categories in Management Console. These ExtIDs will correspond to the Employee IDs for the Employees and the Job IDs for the Pay Categories that are defined in Hot Schedule. Ensure that these ExtIDs match the POSIDs for the employees and job codes respectively.
Below shows an image of Hot Schedule job codes and where they should be entered in Management Console

Employees -> Pay Categories

Employees -> Modify Employees

Complete the ExtID process for each Employee. This will ensure that the employee jobs will sync properly to Hot Schedule.
- Restart onePOS Server(do this only after confirming setup is finished with EBTF), and in about 6 hours or so (depending on the size of the database), the data will be synced to the onemetrix cloud.
Syncing oneMetrix Employees, Pay Categories to Hot Schedule
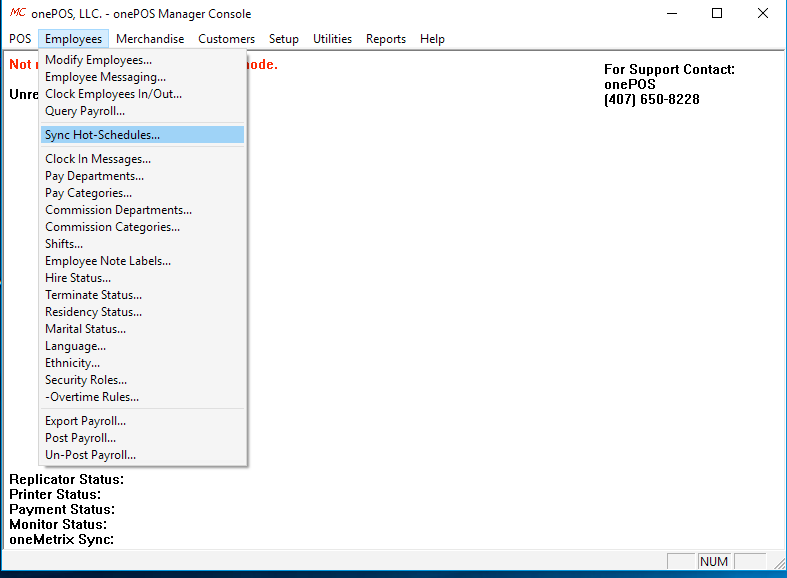
In Management Console, sync the data to Hot Schedule by selecting Employees->Sync Hot Schedules. This process takes about 30-45 seconds.
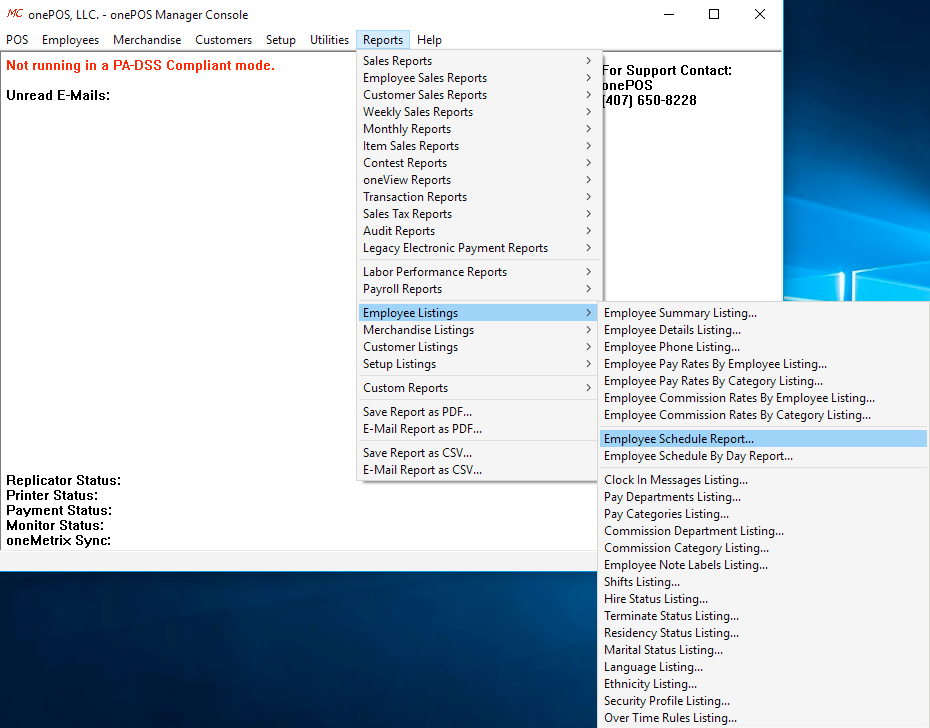
After the initial sync, log in to Hot Schedule to view the employees, pay categories and employee pay categories that were synced. In Hot Schedule, create schedule records for employees, save the schedule, and post the schedule. Sync to Hot Schedule in Management Console again to push the schedules to oneMetrix. Then, view these schedule records by selecting Reports -> Employee Listings -> Employee Schedule Report in Management Console.