This document will go through how to setup the Windows application for onePOS polling.
Prerequisites:
- x64 .NET Desktop Runtime 6.0 – Download .NET 6.0 (Linux, macOS, and Windows)
- Windows 7+
- Administrator permissions
- Installer – https://www.ebtfsupport.com/downloads/poller-installer.msi
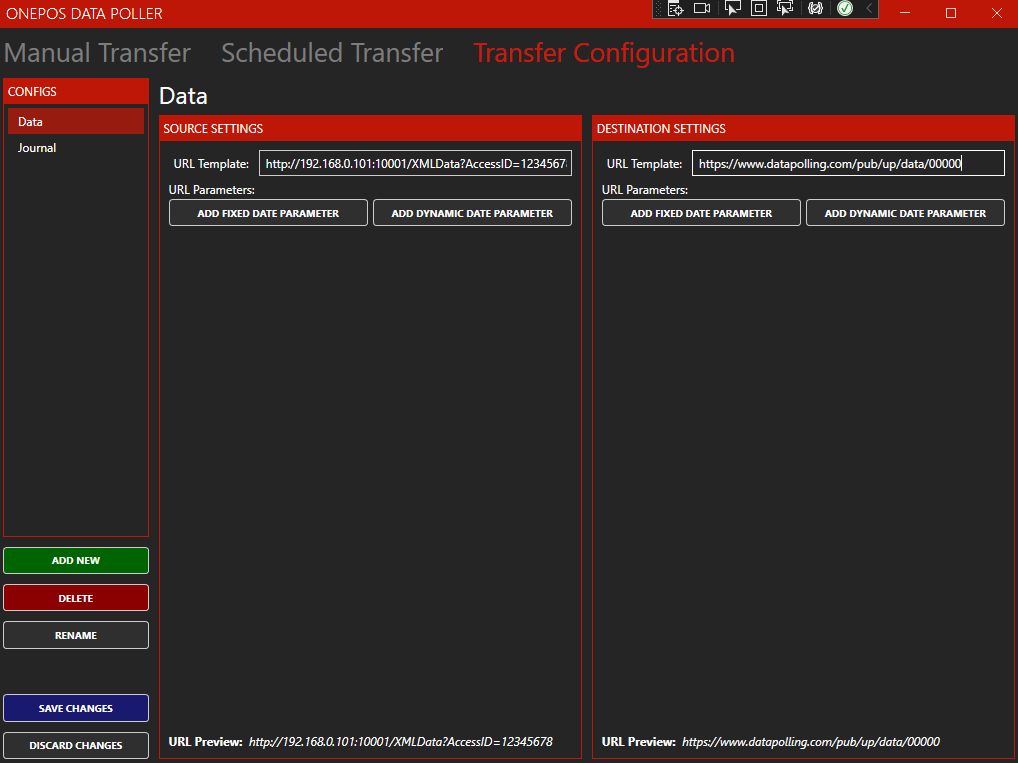
Once the application is installed, navigate to the “Transfer Configuration” screen, as seen below:

You will notice that there are two configs already setup for you:
- Data – This is for the XMLData export.
- Under “Source Settings” -> “URL Template”, you will need to change the IP address of the main onePOS server to match the site in question and you will need to change the AccessID to the “Access Token” setup in the onePOS Management Console
- Under “Destination Settings” -> “URL Template”, you will need to change the “00000” to the site’s onePOS serial number.
- Select “Save Changes” on the left hand side of the window.
- Journal – This is for the XMLJournal export.
- Under “Source Settings” -> “URL Template”, you will need to change the IP address of the main onePOS server to match the site in question and you will need to change the AccessID to the “Access Token” setup in the onePOS Management Console
- Under “Destination Settings’ -> “URL Template”, you will need to change the “00000” to the site’s serial number.
- Select “Save Changes” on the left hand side of the window.
- Details – This is for the XMLDetails export.
- Under “Source Settings” -> “URL Template”, you will need to change the IP address of the main onePOS server to match the site in question and you will need to change the AccessID to the “Access Token” setup in the onePOS Management Console
- Under “Destination Settings’ -> “URL Template”, you will need to change the “00000” to the site’s serial number.
- Select “Save Changes” on the left hand side of the window.
You will notice that under each config, you will have the ability to add a “Dynamic Date Parameter” and a “Fixed Date Parameter”, these are for adding a YYYYMMDD date parameter to the URL query.
A “Dynamic Date Parameter” will change by the day on either Local or Universal time. We highly suggest leaving this at Local time.
A “Fixed Date Parameter” will allow you to specify a specific date. This will allow you to setup a new config in-case you need to create a manual transfer.
Manual Transfer
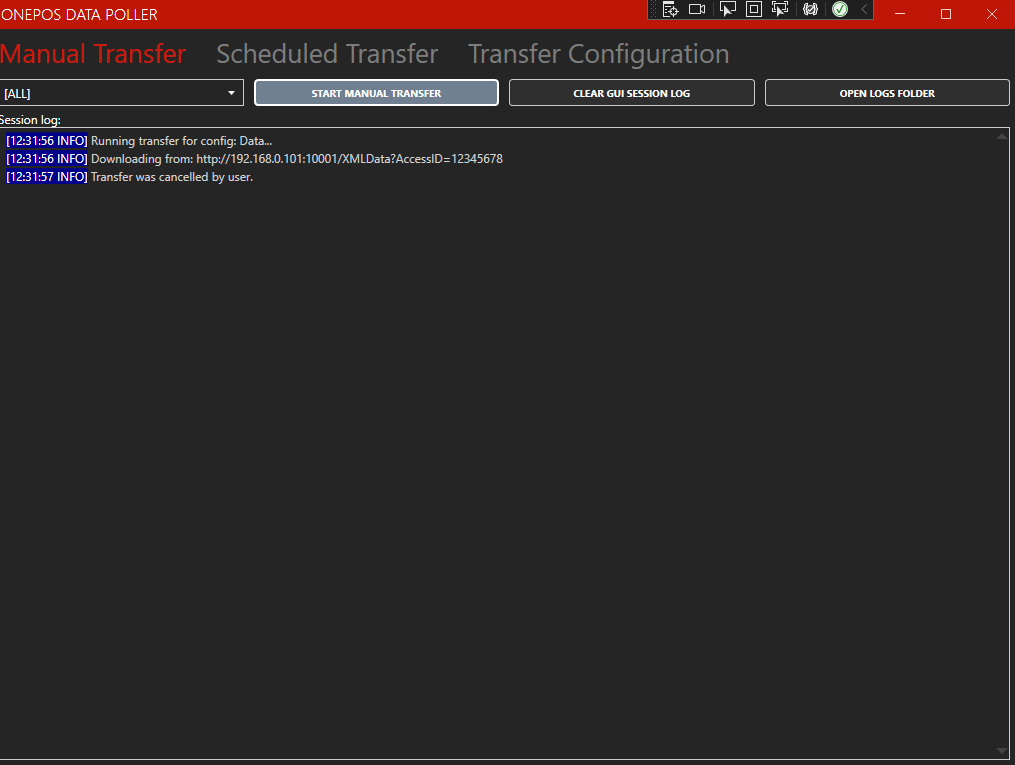
Manual Transfer will allow you to manually transfer all configurations or a specific configuration under the “Transfer Configuration” screen. You will also have an on-screen log showing you the process of the manual transfer and three different buttons.
- Start Manual Transfer – manually start a transfer to the API server
- Clear GUI Session Log – clear the on-screen log
- Open Logs Folder – open the folder containing the logs of all transfers

Scheduled Transfer
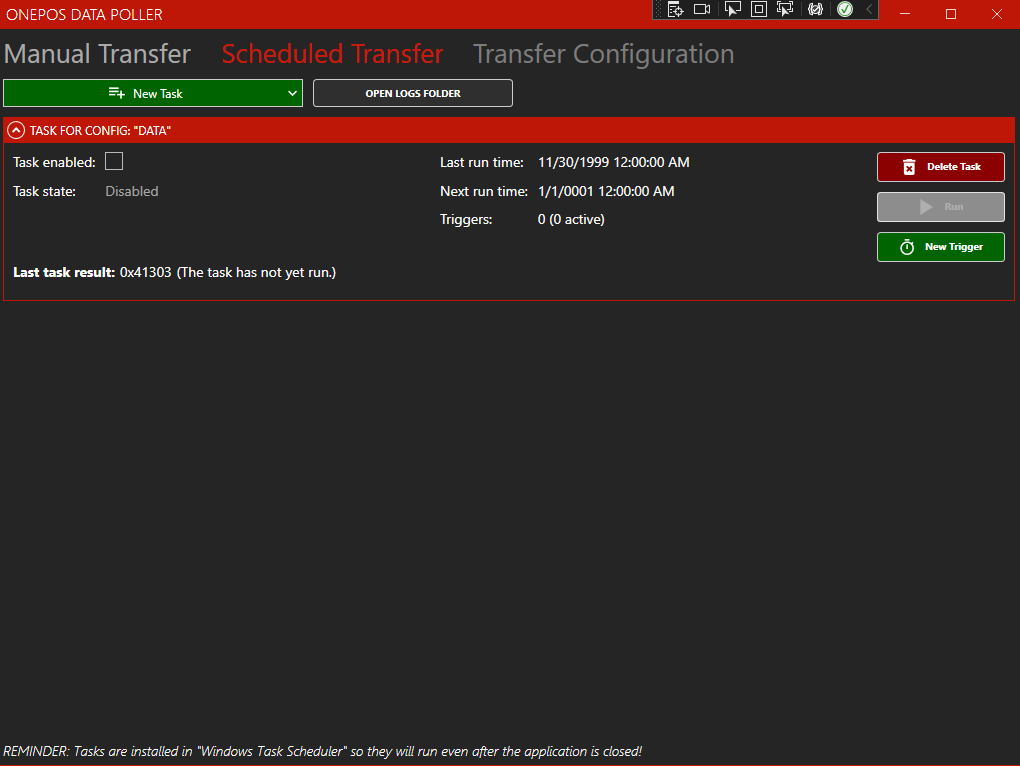
To setup a scheduled transfer of the onePOS REST exports, select “New Task” and select which config you would like to setup a scheduled transfer for.

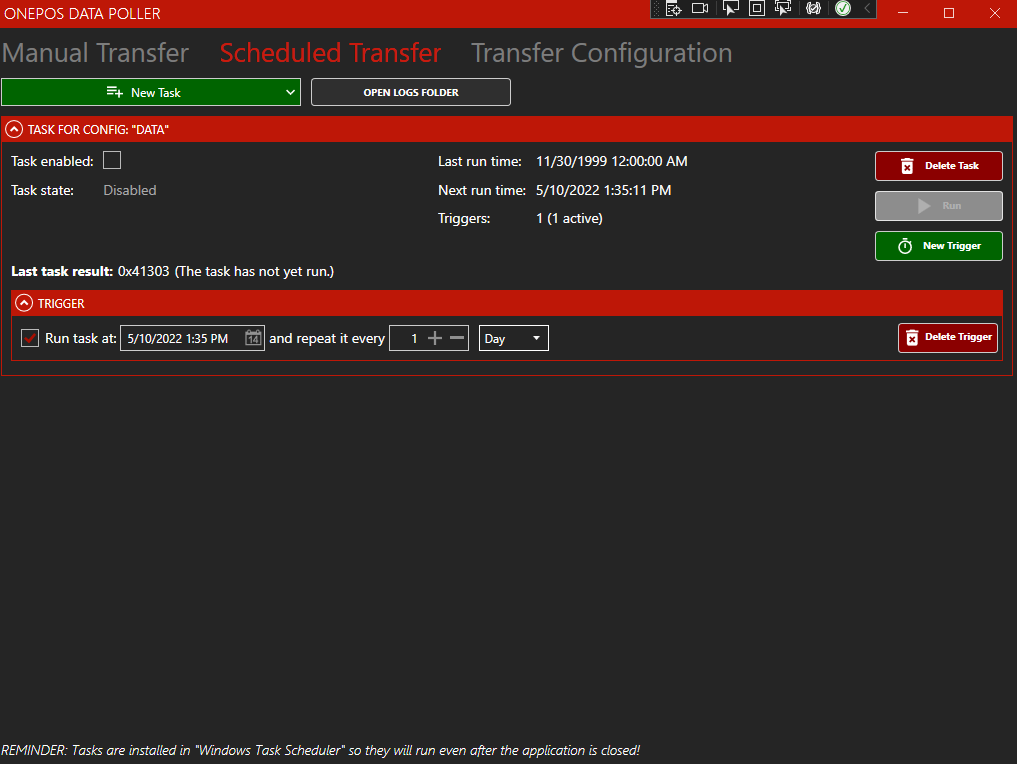
After you have setup a new task for one of the configs, select the “New Trigger” button to add a trigger on which to execute the task. You can set the task to run at a specific time and how often to run it. You can set it to run either by the day or hourly.

You can setup as many tasks as you would like for each config and once the “Task enabled” checkbox is set, it will run at the interval, even after the application is closed.
If you would like to stop the scheduled task from running, you will need to reopen the app and uncheck the “Task enabled” checkbox for that task.
